Music Wall
Pictures and descriptions of my process building the music wall & tips on how to build your own.
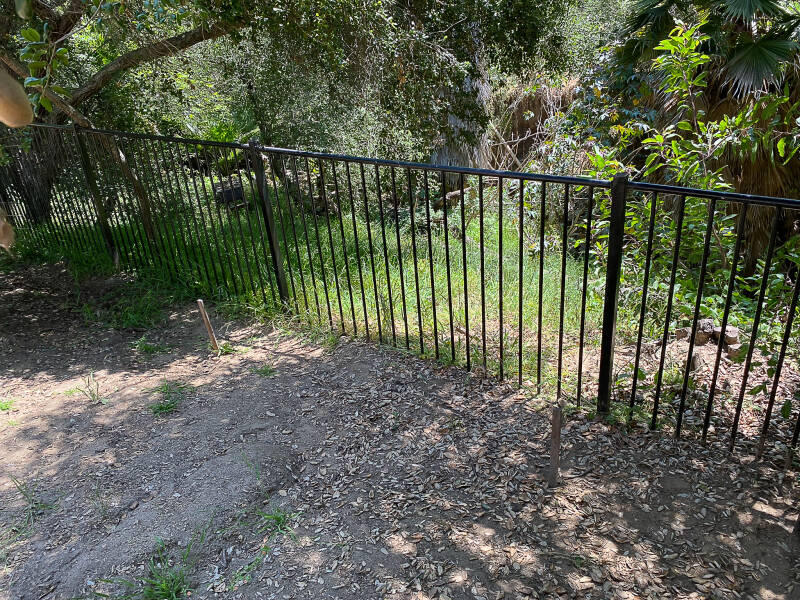
Site Location
I recommend somewhere that is...
- Level ground
- Easy to access
- Provides shade (if needed)
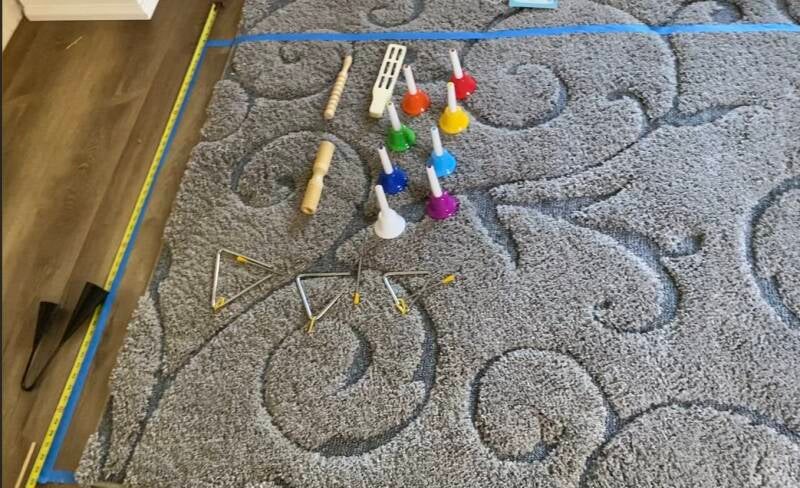
Desired Size
When figuring out the size for your music wall, keep in mind that every 8 feet should have
a post. Before starting construction, visualize where things will go on the wall. When
completing my project, I made a border with masking tape and laid everything out within it.

Materials
Type of Wood:
- Choose wood that will last a long time
- I used redwood for the two main posts and crossbeams
- I used common pine for the face boards
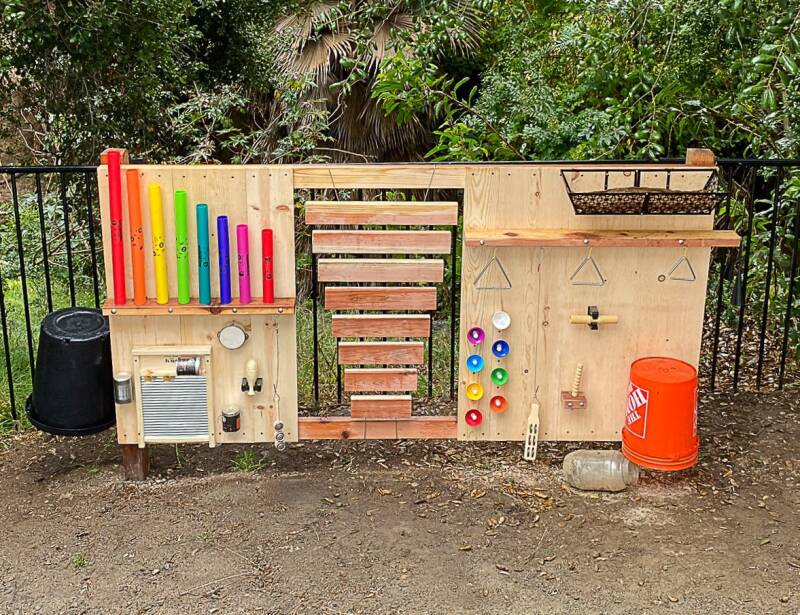
Instruments:
| - Boomwhackers | - Woodblock | - Bucket Drums |
| - Bells | - Washer Board | - Reused Cans |
| - Tambourines | - Triangles | - Wood Scrapper Blocks |
| - Cowbell |
Attaching the Instruments:
- Plan how you are going to attach each instrument to the wall and figure out what you need for it
- I used wire, eyehooks, broom holders, deck screws, lag bolts, lock washers/nuts, and custom wood holders
Other:
- Wood and wire for a hanging xylophone
- Basket for drumsticks/mallets
Construction
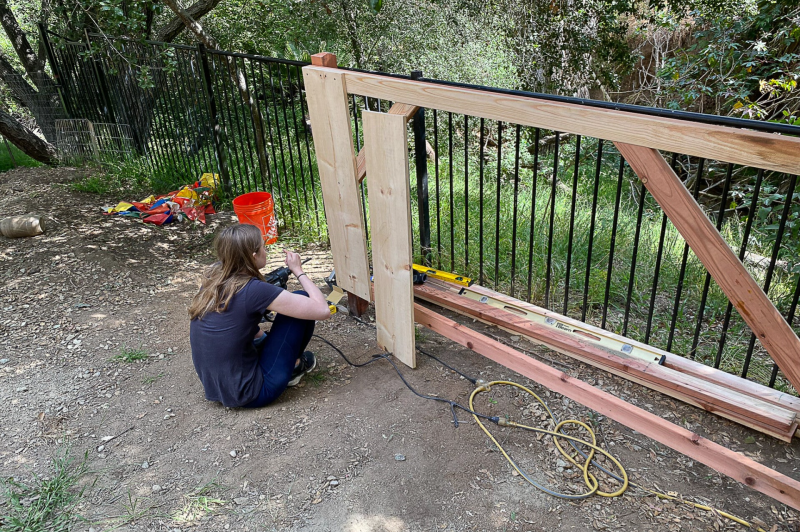
The Posts
- For maximum stability, the posts should be cemented in the ground
- 1/4 to 1/3 of the total post should be underground
- Example: 6 feet above ground = 2-3 feet below ground
- When installing them, follow instructions on the cement bag
- I used fast setting cement
- Try to keep them as in line with each other and as plumb (straight) as possible
- The posts can be held upright by nailing two orthogonal braces clamped to stakes in the ground (as seen to the right)
Crossbeams
- Use them to connect the two posts and provide anchor points for the face boards
- For additional stability, I added two diagonal braces from the posts to the top crossbeam
Face Boards
- We decided to have a hole in the middle of the wall for a hanging xylophone which impacted some aspects of our design
- These can be installed either horizontally or vertically
- We decided on vertical boards because including the hanging xylophone would necessitate extra crossbeams to put the face boards on horizontally
- Keep in mind: It is easier to find shorter sections of quality wood
- The width of the board does not matter much, you can choose based on what you would think looks the nicest and fits your design
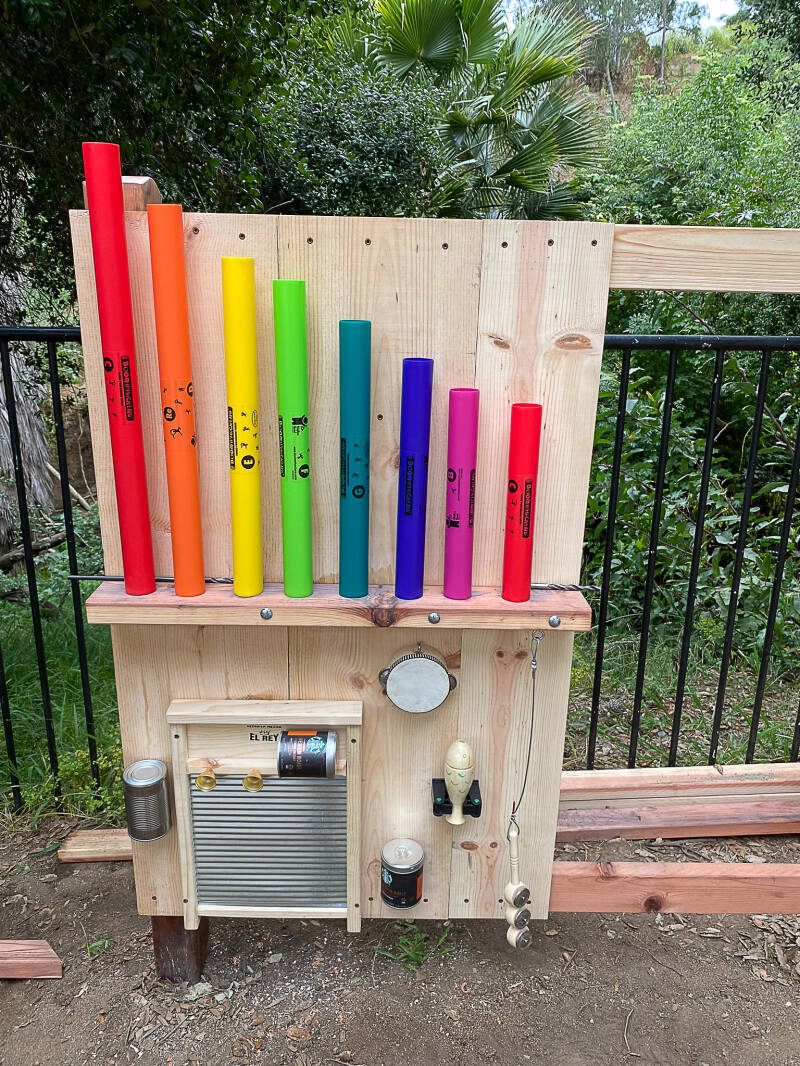
- I used 8 inch boards to have fewer seams to work around while attaching instruments
- When attaching the face boards to the crossbeams, I used two screws on the top and two on the bottom with one through the diagonal crossbeam (if possible)
Instruments
- The custom wood components (shelf-like structures that held the boomwhackers, triangles, cowbell, and a wood scrapper block) and bucket drums were attached via lag bolts, lock washers, and lock nuts
- Nuts with the plastic inserts are resistant to loosening because of vibrations
- A wood block and a wood scrapper block were attached with broom holders (these were installed using the provided hardware)
- Keep in mind: Instruments held in these are detachable
- Instruments that required shaking were attached with wires (secured with cable crimps) looped around eyehooks
- The triangles, cowbell, and tambourine were attached via eyehooks
- The bells where inserted into drilled out holes from the face boards
- This method means they can be removed from the wall
- The hanging xylophone
- Two wires were attached to the boards and crossbeams by cinching them under fender washers using deck screws
- Everything else was attached using screws
Protection
- I recommend using a canvas cover to protect the wall from weather when it is not in use. The wood can also be painted, coated with polyurethane, or decorated by the kids with paint and then sealed with compatible weatherproof sealant. Have fun with it!
- Keep in mind that spiders and other critters may find their home on the music wall


Create Your Own Website With Webador